Showing posts with label design. Show all posts

Friday, June 26, 2015

I'm back & Scratchboard Butterfly!


Hi guys! I've been MIA for quite a while! & So many new things have happened. Number one: I started a new job almost 3 months ago, with a lot of friendly new people. I'm really loving it! 
If there's one thing you should know about me, is that I'm an introvert. Like total homebody sometimes. But at the same time, I really contradict myself. I love being alone. Yes, that whole "people take my energy and I need to get away to recharge" thing is really true. But I've realized that like with my first job, as well as with the job I currently have, I need to be out with people. It's good for me. 
As much as I love my alone time, company is not so bad. 
Here's a scratchboard I made for one of my aunt's on her birthday, back when I was in high school. We literally used a blade basically taped to a popsicle stick for this in class, instead of an x-acto knife! haha I guess it was for our safety? I'll never know. My dad later bought me my own little kit though, no worries!
I hope to be back more often and keep you updated on some of the pieces I've been working on!

Love ya lots!
Angie

Wednesday, August 20, 2014

What I've Painted Wednesday: Elephant in Stripes


Elephantsssssssssssssssss.  Aren't they just beautiful and majestic?! I Love them.
This piece was done for my Design 1 class a couple years ago.  Obviously, this particular piece is not a painting, but it is a piece I worked on for some time so I've decided to add it to my #whativepaintedwednesday segment, which is probably what I'll be doing.  I really had a lot of fun doing this piece; I felt like there were was no limit to what I could do. 
 I decided to leave a thin line in between the elephant and the background which I think help a lot to really define the subject. This piece is done in sharpie on a 24"x18" sheet of drawing paper.
 
Looking at him makes me happy.  
 
 
♥Angie

Wednesday, August 13, 2014

What I've Painted Wesnesday • Decisions: An Apple


Guess what guys?! It's Wednesday! You know what that means?! Yes! #WhatIvePaintedWednesday! These past couple of weeks I've had some trouble posting, but finally! Here it is....
So for one of my painting 2 class projects, basically the first of that semester, we were to use an apple in our painting.  I really enjoyed this class.  This class consisted of learning how to make your own paint.  This being our first painting, we made acrylic paint. We used the pigment of our choice and mixed it in with an acrylic medium to make a paste. It was totally fun and I enjoyed the challenge.
Not only did we have to make our own paint for this class, but our instructor also gave us a theme or an object that had to be included in the painting. Having it be an apple, I had several ideas in mind.

This painting obviously has many meanings to it. It's a bit personal, (what painting isn't right?) things I've struggled with all my life. And that's why I love to paint and create. It consumes me.

I used a real apple I cut, as my model while I painted.  I obviously had to take pictures of it as well before it turned brown in case I took longer to finish. 
I remember wanting to add more objects to the piece, but also wanted to keep it simple yet complex.   I like to work in odd numbers, hence the apple, ladders, and tree and the three different colors.  For the background, I always tend to keep it like this, just a color.  It's something I do unconsciously.  Maybe its my style, that says something about me. Or maybe I just over-analyze everything a bit too much, haha.

As soon as the apple was done, I still didn't feel too sure about the background as it was originally purple. I have no idea why it was this color in the first place, but I tried using a photo editor to see what color would look best.  Then it clicked. Complimentary colors, duh.  Making it a brighter green only helped it even more. 

This is still one of my favorite pieces. It was actually featured on Artista Social's Latin American Art Facebook Page, Twitter, and Instagram as the Artista Social Art of the Day back in 2012.  You can just imagine how immensely happy I was when I received their email.

Decisions are hard to make, even when you know there's only one way to go.

♥Angie


Monday, August 11, 2014

DIY Mason Jar Bank

So even though we  are half way through the year, it's never too late to start something new.  I've realized that to get something accomplished I must make it personal. I appreciate the little details in things, and therefore I wanted to make a little piggy bank that actually made me want to use it. There's tons of them out there, but why not make your own personalized?
I've been collecting mason jars for a while now, and love finding new ways to used them. Depending on how much you trust yourself of not opening the jar, this project will work perfectly for you.


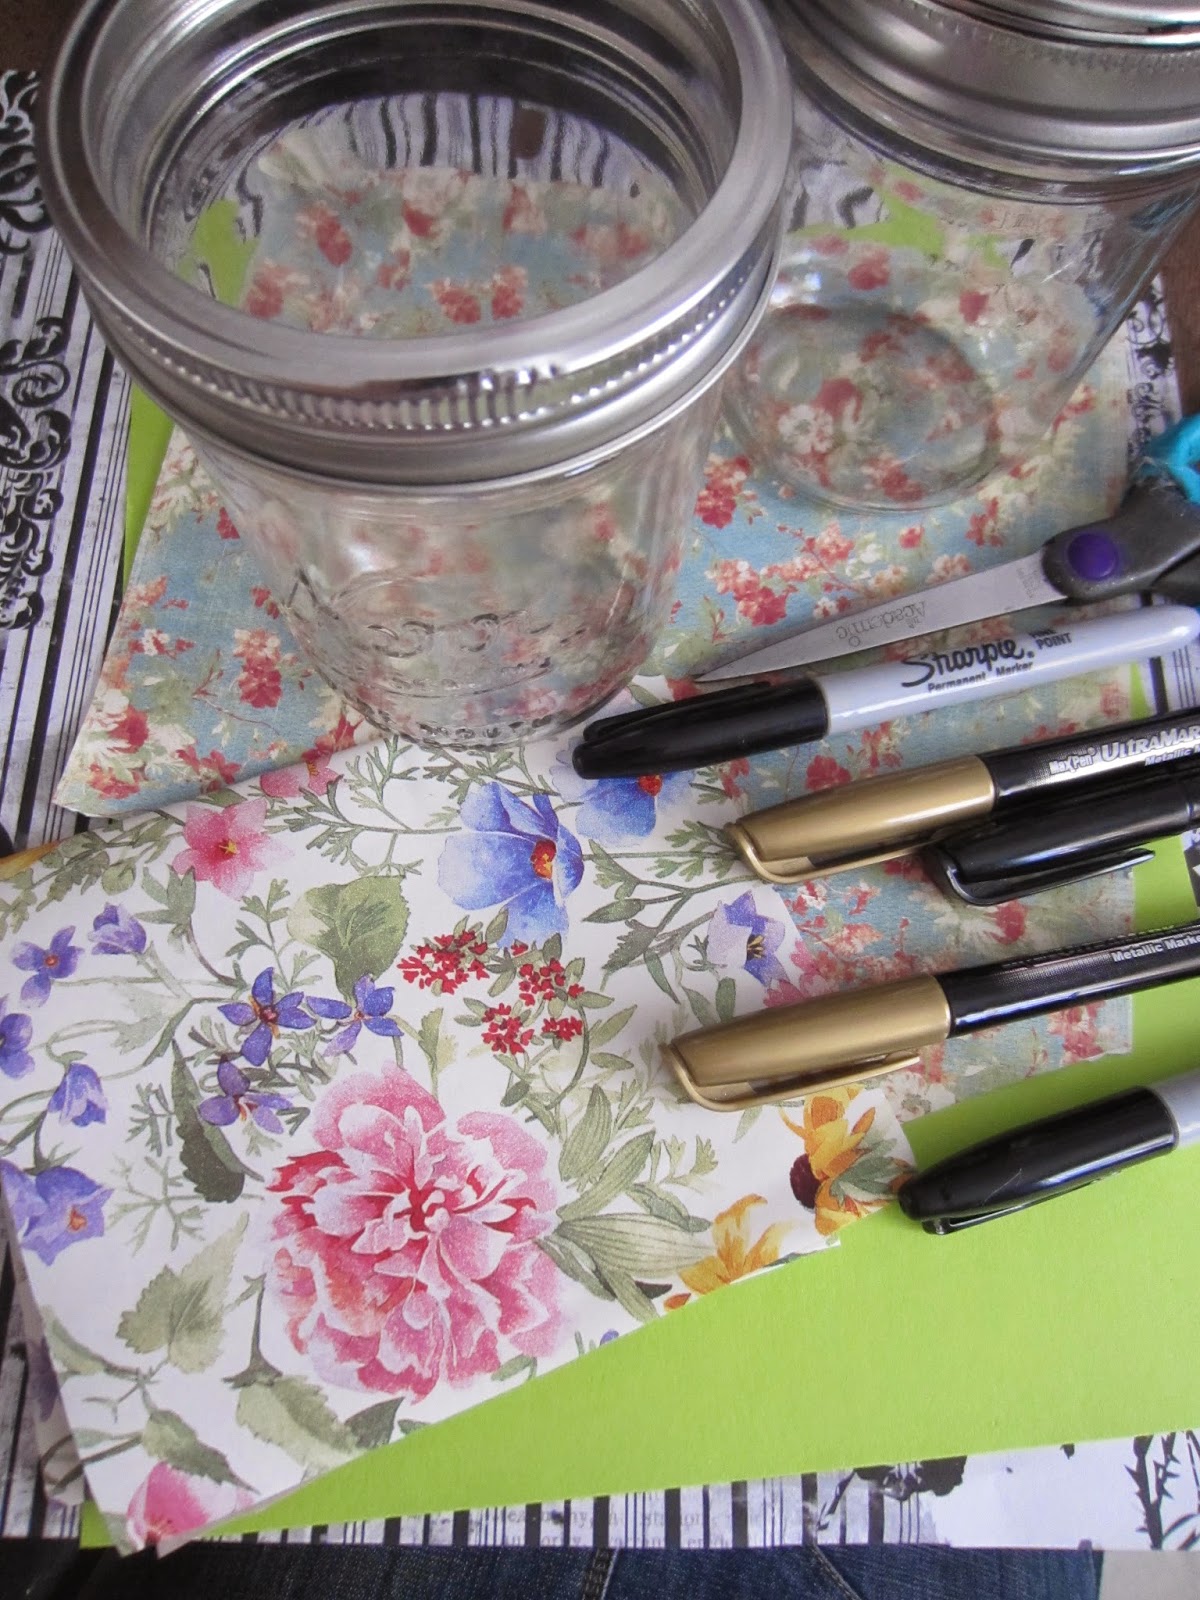
Items you will need:


-Masor Jar (size of your choice)
-Cardstock and different patterned paper
-Scissors
-Markers/sharpies
-Things to decorate with


Instructions:
First, start off with the lids.  I decided to take the lid off and use cardstock instead. You can use the original lid, it all depends on personal preference, but it is much easier to make the coin slot with cardstock as well as the decorating. I started by using the lid as a stencil and cut a lid from it.  Then, using your scissors or an xacto knife cut the coin slot.  I didn't really care if it was exactly in the middle so I just winged it.


I then, put it off to the side and started decorating the piece that's going to go inside the jar.  You are welcome to paint your jar any color you prefer, but I did it this way in case I wanted to use the jar in the future for a different purpose. I used different patterned paper and measured the width of the paper with the length of the jar.

I then cut that piece and proceeded to measure the length of paper by sticking it inside the jar to get a rough estimate. My paper measures roughly around 10 inches by 4 inches.

With your paper cut out the desired size, You can now go crazy and decorate it as you wish! I decided to go for a floral pattern (of course).  I layered different patterns and papers until I got what I wanted.


I then, flipped one of the papers to have a clean white background to write what my specific purpose for this jar was. You can choose to glue down the paper, but I decided to just tape it. Easy and you can't see it through the glass. 

You then, just roll the entire paper into the jar and if you like you can tape it together, although this is not necessary at all.

Finally put your lid on the jar and screw the top right on. Presto!
I made a couple of jars in the process and had fun playing with different patterns and ways of decorating them.  For both jar lids I decided to use different cardstock, one silver and the other a lime green.  After I was done I noticed the green lid was looking dull, so I added this adhesive trim I got at my local craft store, and it was the finishing touch! I hope you enjoy making some for yourself and put them to use.  This would be a super fun project to do with kids during the summer as well!


Wednesday, July 23, 2014

What I've Painted Wednesday • My Paper Bomb

Hey guys! Here's my first #whativepaintedwednesday! And also my first ever piece for a painting class. I thought that would be appropriate, although the following paintings for sure won't be in order. I promise I'm not that OCD, haha.  So this piece was done for my Painting 1 class, years back. We had to include a paper sack/bag into the painting some way or another.  I always like these kinds of challenges.  They tend to become very personal.  This piece also had to do with us or describe us in some way.  I remember coming up with the idea, but trying to push it to the back of my mind while looking for something else.  That sometimes doesn't work, as once I have an idea, I just have to create it.  It's a need.  But that's just me.

This painting is about me personally keeping it all in, everything.  Every single feeling, emotion, words, anything and everything, until I just can't. That's how I felt, as if I would just explode like a bomb.  That's how I felt back them.  Of course now I've gotten better.  I've learned ways to deal with things and how to take out my stress and frustration, and worries in a healthy way.


The ribbon in this piece is not only there because I'm known for wearing ribbon on my hair, but also to represent or symbolize the real me. That's always there all along and not lost, I decided to use purple for no apparent reason. It once was my favorite color, but while painting this I just identified with the color.  I did this same thing in a self portrait back in a high school project where I sewed purple thread into the black and white painting.
I later found out a purple ribbon is also worn to raise awareness of several causes including epilepsy, of which I suffered from until about the age of 15. Coincidence? I think not.

Through some of my upcoming paintings you'll be able to see that the background of my pieces tends to be one color with no actual background to the picture. It's as if the object is floating in the air and I've thought about this several times.  I  do this without even thinking. I get an idea and think only of that object or scene, but not of what's happening around it.

I really enjoyed this project and will maybe continue with more pieces for some sort of series.


Angie 

Monday, July 14, 2014

What I've Painted Wednesday -


I've decided to start a #whativepaintedwednesday segment with some of my past paintings! Each week I'll be posting a new piece up and talking more in depth about it: the process of completing it, the thinking process behind each one, and any other extras I come up with.
Of course, I'll still be adding more DIYs and all sorts of posts during the week, but Wednesdays will most likely be for older painting projects.
Expect it really soon! I can't wait!

Angie


Saturday, July 5, 2014

Here I go, My first post!


"To Draw, You Must Close Your Eyes And Sing." -Pablo Picasso (probably my favorite quote of all time)

So I've been wanting to start a blog for a while now, and I finally got the guts to do it!

I love to create. Making things with my hands. I feel it is my purpose in life. It has always been a very spiritual thing for me, to paint.  I know that without God I wouldn't have this talent, or anything else for that matter.  But mostly I know that if I wasn't doing it for Him, nothing would turn out right. I first discovered this amazing feeling when I finished a mural at our church, it is about 24 feet in width and took me two days to complete it.

I also like to sew. Ahhhh. It's a new thing I've been working on for the past couple of years.  When I received two, yes TWO sewing machines in perfect condition from a complete stranger! I knew it was meant to be. I recently opened an Etsy shop where I sell things I've sewn, like scarves and jeans I've turned into denim skirts. In case you want to check it out here.

I feel a complete satisfaction while working on something, I love to stay busy.  So may it be painting, sewing, or any of my projects for around the house or church, you'll see a glimpse and much more of it all here. Enjoy!

Love ya lots!
Angie